Your Shopping cart
😊 Product added to cart successfully
Product removed to cart successfully

Creating a peaceful, stylish living space is a top priority for many homeowners today. Whether you’re battling echo in a large living room, reducing noise from a home office, or upgrading a gaming setup, decorative acoustic panels offer a perfect blend of function and beauty. This DIY guide will walk you through everything you need to know to install decorative acoustic panels on your own, transforming your home into a quieter and more visually appealing sanctuary.
Decorative acoustic panels are more than just sound absorbers. They serve three key purposes:
Noise Reduction – High-density materials absorb sound waves, reducing echoes and improving clarity in any room.
Aesthetic Appeal – Available in a wide range of colors, patterns, and textures, these panels double as wall art.
Easy Customization – Panels can be cut, arranged, and installed to suit different room sizes and design styles.
Whether you prefer a sleek modern look or a cozy rustic vibe, decorative acoustic panels can seamlessly complement your interior.
Before starting, gather the following items to ensure a smooth installation:
Decorative acoustic panels of your choice
Measuring tape and level
Pencil or chalk for marking
Adhesive (construction adhesive, spray adhesive, or double-sided mounting tape)
Screws and wall anchors (optional for heavier panels)
Utility knife or saw (for trimming panels if needed)
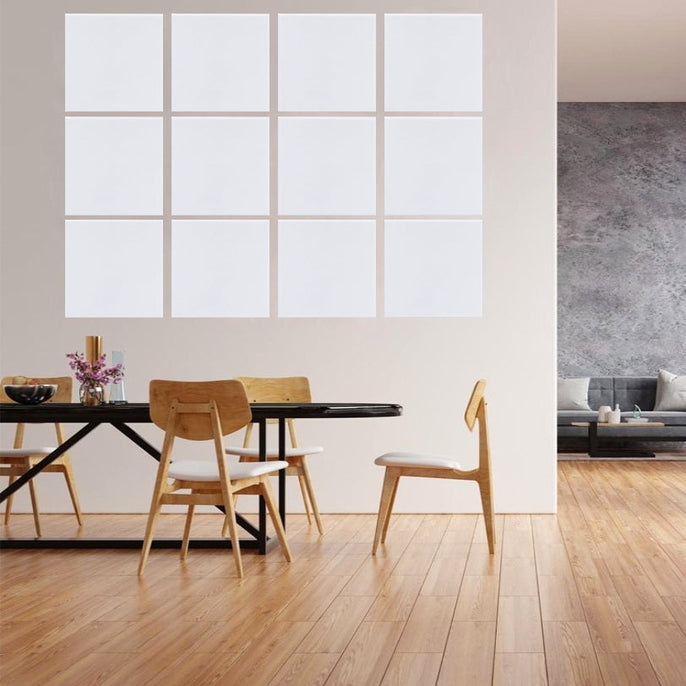
Decide where you want to install the panels—behind a TV, along a hallway, or on a ceiling.
Use a measuring tape to mark the wall and create a balanced layout. For a designer look, experiment with patterns such as grid, staggered, or hexagon clusters.
Clean the wall thoroughly to remove dust and grease. A smooth, dry surface helps adhesives stick securely.
If your panels need trimming to fit around outlets or corners, use a utility knife or small saw for precise cuts.
For lightweight panels, heavy-duty double-sided tape or spray adhesive is usually sufficient.
Apply evenly across the back of each panel. For heavier or larger panels, use construction adhesive or screws with wall anchors for added security.
Press each panel firmly against the wall, starting from one corner and working your way out.
Use a level to ensure straight alignment and consistent spacing.
Allow adhesives to cure for at least 24 hours. Step back and enjoy your newly stylish, noise-reduced space!
Mix Colors and Shapes: Combine different shades or geometric shapes to create a unique focal wall.
Layer with Lighting: Add LED backlighting or spotlights to highlight the texture of the panels.
Balance Function and Style: Place panels at ear height in conversation areas for optimal sound absorption.
Decorative acoustic panels require minimal upkeep. Simply dust them regularly with a microfiber cloth or use a vacuum with a soft brush attachment. Avoid harsh cleaning chemicals to protect the fabric or finish.
Installing decorative acoustic panels is an easy and rewarding DIY project that elevates both the acoustic comfort and visual appeal of your home. With just a few tools and some creativity, you can create a quieter, more stylish space—whether it’s a living room, studio, or home office.
Ready to get started? Pick your favorite panel designs today and transform your walls into a statement of sound and style.
